
Hibernatin' and Groovin' 80s Bike

If I can get through a day without leaving my place it's a success ... so in that this Sunday was a total success. I watched appoximately 10,000 episodes of Pingu. Oh that wacky bird! When their lips move and their big playdoh feet slap on the ground when they walk around -- kills me everytime.
I did get the Rare Groove Bike finished. Here's a quick walk through of the build:
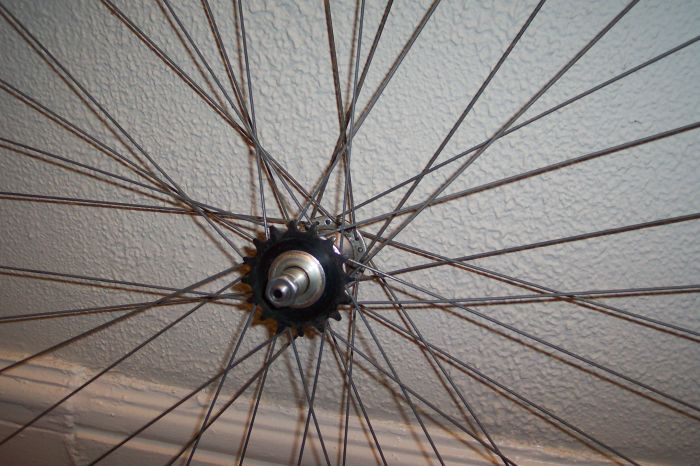
The first step was to get the freewheel removed (I had to pay a shop for this since I don't have the tool) and install the cog.
I'm no perfectionist, but it's important to know where to put your attention and when you can play fast and loose -- and perfection is critical when it comes to chainline on a fixed gear bike. The chain has to run absolutely straight from the chainrings at the front to the cog on the rear. The chain is both your gas and your brake, so if the chain derails because it's not straight you could find yourself fucked.
Also a straight chain is smoove and quiet -- which is a big part of the beauty of a fixie.
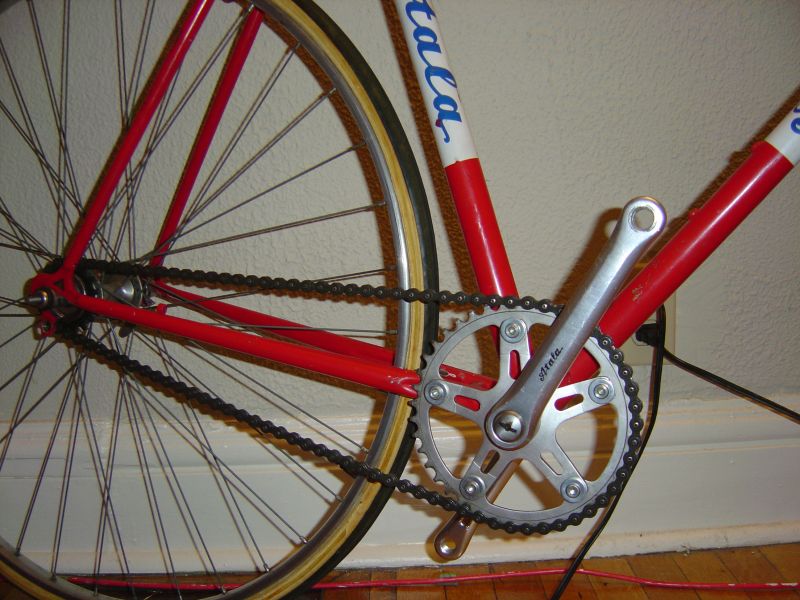
This is the view from the back of the bike.
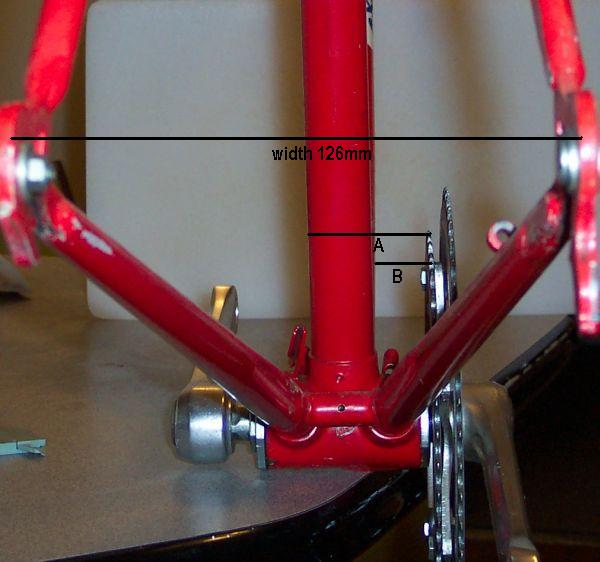
Ideally for a single gear setup the chain sits 42mm from the center of the bike give or take 3 mm.
A simple way to determine the chainline is to measure:
A: from the "far" side of the seattube to the chainring
B: from the "near" side of the seattube to the chainring
The width of the tube is A-B=C and the distance the chain sits from the center of the bike is D=B+C/2. This number should be 40-45mm. Less is better as long as the chainring clears the frame. The outer limit is constrained by how far out the cog can sit within the rear dropouts, which is about 60mm.
On a modern road bike the inner ring is 41mm from the center of the bike and the outer is at 46mm (the space between them is 5mm). So if you have anything resembling a standard double crank and BB axle the inner position will be the suitable one. If you want to use the outer positon (it does look better) optimally you will need a BB axle that is about 5mm shorter.
On this particular bike the inner ring sits at 40mm and the outer ring sits at 48mm, and I use the inner position.
Since the rear of the bike is 126mm wide, ie. it extends 63mm left and right, so for the cog to sit 40mm for the center of the bike it has to sit 23 mm inside the frame (63-40=23!)
With the cog simply threaded and no other changes, it sits waaay too far in:
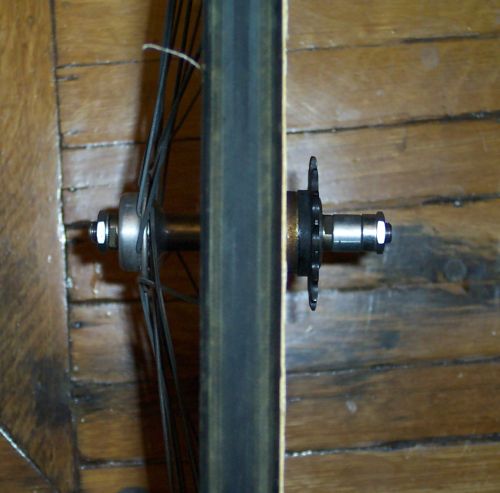
Spacers from the right side have to be moved to the left side to bring the cog over to the outside while preserving the 126mm overall width. Notice too that the cog as a shoulder so that I can move it laterally a few mm simply by flipping it around, but I chose to place the shoulder on the inside to reduce the amount of spacers I have to move to the other side.
This is the tedious part. Though the measurements get me in the ballpark, no matter how well you measure, things move around when you tighten it all up, so there is a trial and error component and the final stages are all done by eye, until you get it nailed.
One consequnce of this shifting around is that the wheel will no longer be centered within the frame, but will be offset to the right by the same amount I move the cog over by.
To recenter the wheel I can tighten some left side spokes and loosen some right side spokes. If the spoke lenghts can't accomodate this, it is a crisis -- the wheel will have to be rebuilt with properly sized spokes. Luckily it all works out. Since I will not be using the big ring I remove it.

One important feature, which makes frames from this era particulary suitable for single spped converions are long horizontal dropouts which allow plenty room for chain tension adjustment.
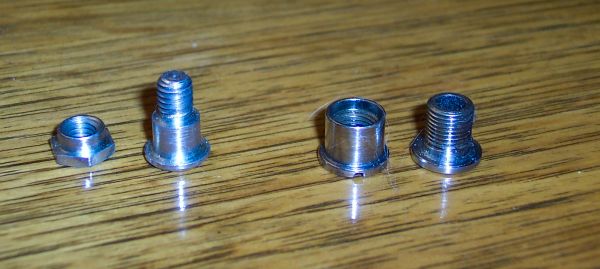
An oddball feature was the weirdo crank bolts. On the left you see the weirdo crank bolts and on the right you see a std. Campy crank bolt. These bolts were simply carriage bolts with an 8mm unthreaded section and a nut with a short matching collar. I've never seen bolts like this before on a crank -- so losing these would be a major hose.
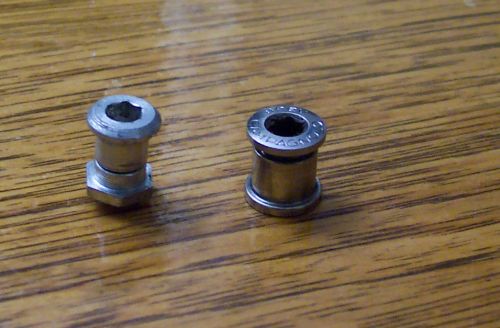
A regular crank bolt has a 10mm collar the bolt threads into. One can replace a std. crank bolt with a shorter version if you only plan to run a single ring, but this isn't an option so I bought some 1mm think washers at Home Hardware to take up some of the space creaded by removing the big ring. Also I'm excited that my coffee table looks like wenge in those pics, even tho it's not.
I used a BMX chain to finish off the drivetrain. his is how it looks all put together :
I use a (close to) period-correct Selle Italia Turbo and silver drop bar and forged stem to finish it off.


Since I plan to sell the bike I opted not to install the brake levers or tape the bars so it stays lookin' pristine. The final owner may decide on a different brake lever arrangement or may only want to tape a part of the bars or have no tape at all.
Here's the final tally:
Cash:
Purchase price $50
Dura Ace Cog $25
Brake levers $20
Chain + Labour $10
Handlebar $10
Bar Tape $2
From the Stash:
Stem (est $30)
Turbo Saddle (est $30)
Total investment was about $180 and I have already listed it for $350 and have already had some enquiries. I would like to ride it for a few weeks before I part with it, but only if the roads are dry. This bike is no beater or commuter. I am treating it as a piece of art in my place and it would actually make a nice display piece in a business or for an aficionado who wants special Lazy Sunday coffee shop bike that gets ridden occasionally and looks good the rest of the time.
Labels: assbikin
posted by Amit @ 2:00 AM
![]()
1 Comments:
I am writing from Italy. My grandfather, Cesare Rizzato, started Atala in 1921. The company was eventually sold in 2002, but seeing pictures of old Atlas still moves me... Thanks!!
Post a Comment
<< Home